Alt Text Studio · Documentation
How to edit ecommerce product details
Add brand, product, and color attributes that get baked into product alt text.
When you're generating alt text for product photos, the AI doesn't always know the brand or model name from the image alone. Filling in Brand, Product, Primary Color, and Secondary Color ensures these specifics land in every description.
Per-image fields on /create
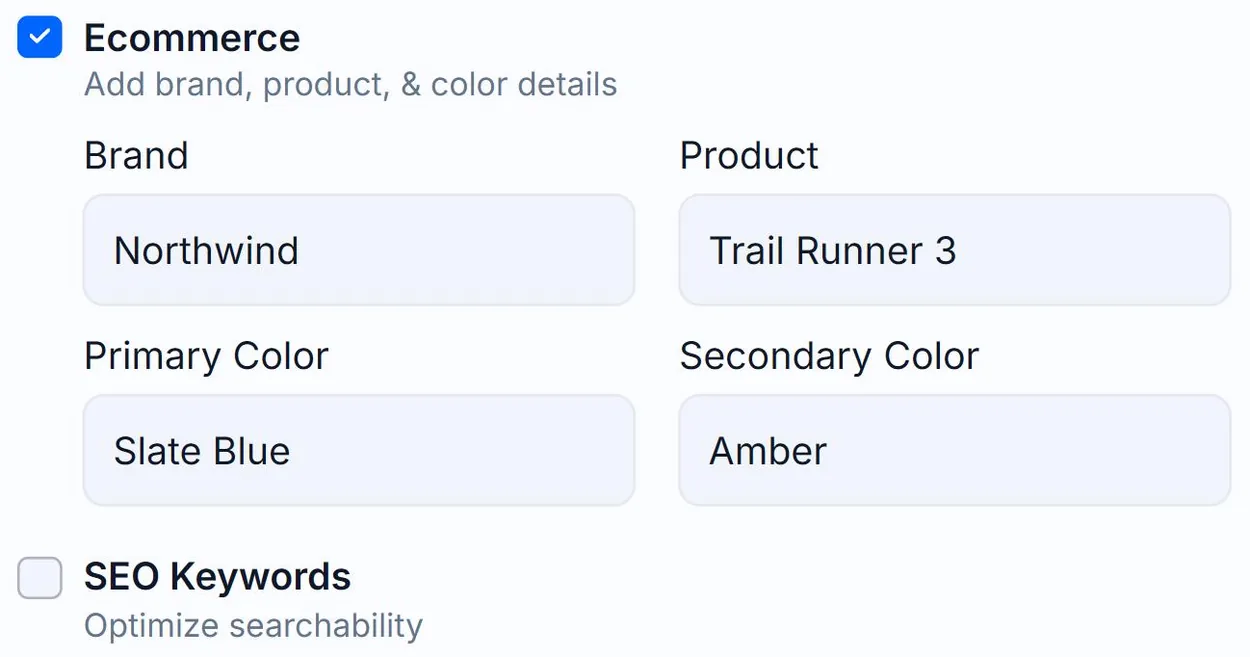
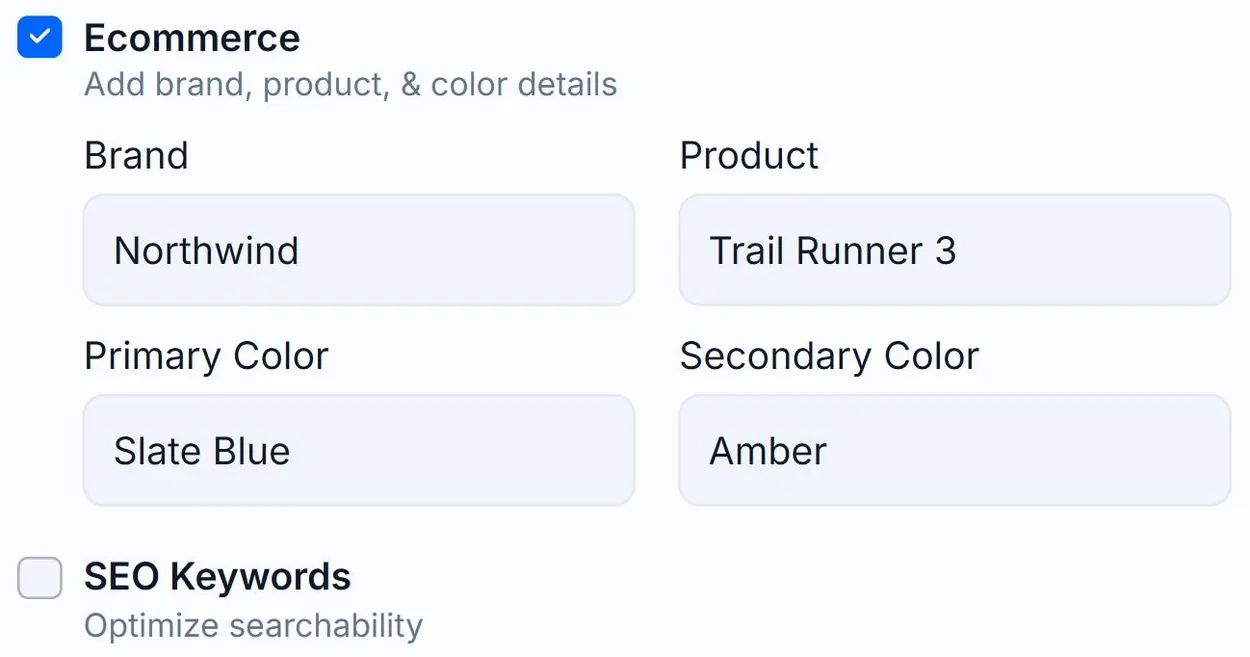
Each image card on the Create page has an Ecommerce checkbox in its Options panel. Tick it to expand fields for Brand (e.g. *Sony*), Product (e.g. *WH-1000XM5 headphones*), Primary Color (e.g. *Silver*), and Secondary Color (e.g. *Black accents*).
Set defaults so you don't retype
If everything you generate is for the same brand, save it in My Account → Generation Defaults → Ecommerce. Every new image inherits those values.
Bulk via CSV
CSV import accepts brand, product, primary_color, and secondary_color columns (the secondary_color column is supported by the importer even though it isn't shown in the on-screen template). Useful when each row is a different SKU.
Re-set them before regenerating
Brand/product/color values displayed on the detail page are read-only. To change them on a saved image, head back to Create, use the same image with updated ecommerce fields, and Regenerate there. Future generations always honour the values currently set on the card.
Related guides
- How to change and save Generation Defaults— Set your preferred options once on the My Account page and Alt Text Studio will use them everywhere.
- How to add a custom prompt— Steer tone or context with free-form instructions to the AI.
- How to import a CSV— Bulk-import images by uploading a CSV. Includes the supported template.